Last Modified 19 May 2008
jyPOSH Installation Instructions
jyPOSH is a version of POSH that runs in Jython. It
also runs in Python, but the GUI and MASON use Java, so if you want to
use those (which we assume here), you need to run jyPOSH in Jython.
Below are the installation instructions on how to perform a plain
jyPOSH install without an IDE. Further down are
instructions on how to set up the Eclipse IDE to modify/write POSH
plans and behaviours.
Installation Instructions:
- Make sure that Java is installed (at least 1.4, preferably 1.5).
You can test that on the Java VM test
page.
- Download and install Jython.
- Be sure to
get version 2.1 or 2.2.
- Follow the Jython
installation instructions carefully.
- You do not need to install the source if you don't want to --
the standard install is fine.
- Download jyPOSH and extract it
somewhere on your
computer.
- Read README.html in the jyPOSH root
directory for instructions on
how to run jyPOSH from the command line (this works for Python too).
- Don't
forget to set the correct CLASSPATH to add the required Java JARs.
More details are given in README.html.
Using
Eclipse to develop/run jyPOSH
The Eclipse IDE is a
universal toolset for developments. The instructions below explain how
to install Eclipse, and how to use the Python Development Environment
for Eclipse to run/develop jyPOSH plans and behaviours.
Note that
these instructions have been modified since May 2007 to now
use the Python Development Environment rather than the Jython
Development Toolkit, as it seems to support different platforms better.
Installation Instructions:
- Make sure that jyPOSH is installed as described above.
- Download and install the latest Eclipse Platform/SDK,
if you haven't already.
- Download and install the version of the Python Development Environment
(PyDev) for Eclipse that matches your version of Eclipse, following
these
instructions. It
enhances Eclipse with the ability to edit and run Python/Jython code.
- You don't need to download any files if the "Installing with
the update site" section of the above mentioned installation
instructions work
for you. Note that at the time of this writing, the image on the
installation page showing the "New Update Site" dialog contains the
wrong URL, but the text gives the correct one. It should be
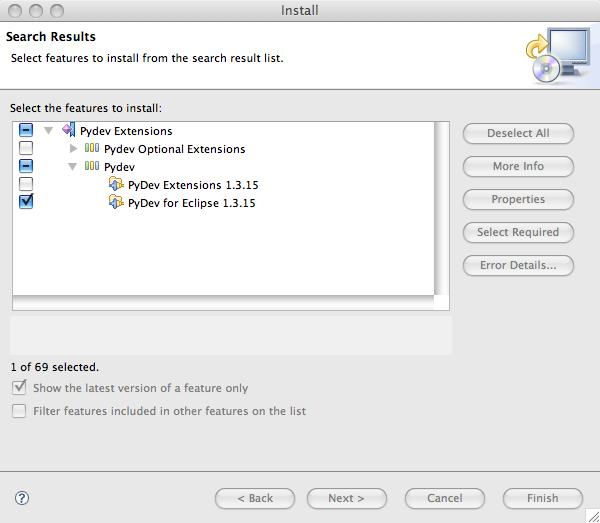
"http://www.fabioz.com/pydev/updates". When asked to select
which features to install (that is, in the dialog named "Update", after
selecting "Finish"), only select PyDev for Eclipse, and not PyDev
Extensions or any other feature. PyDev for Eclipse is the Open
Source package. The other ones require you to pay to use them. You
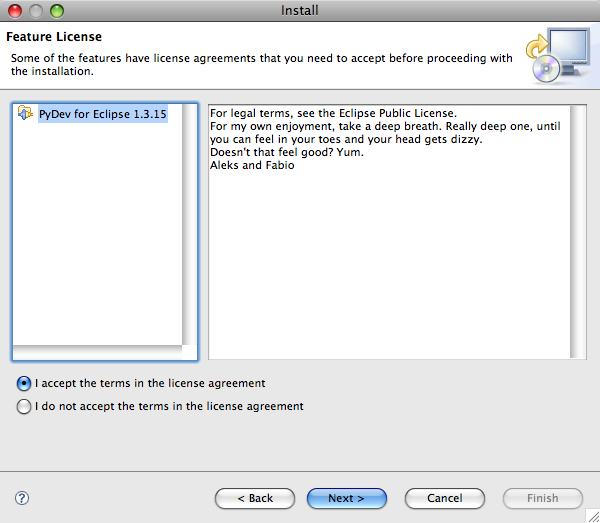
might be asked if you want to install the package even though it is not
digitally signed. Just select Install in
that case.

|

|
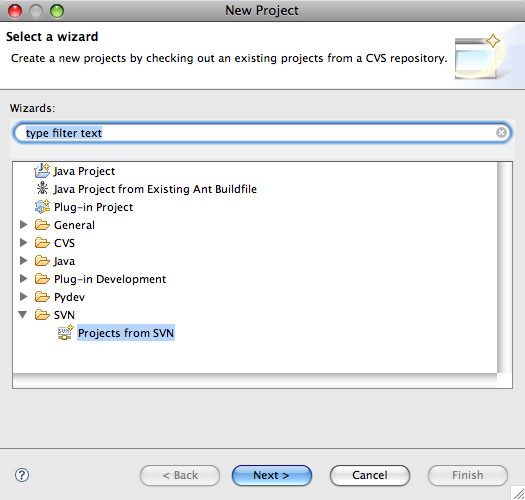
Choose SVN as the type of
package. Eclipse will figure out for itself that it's pydev.
|
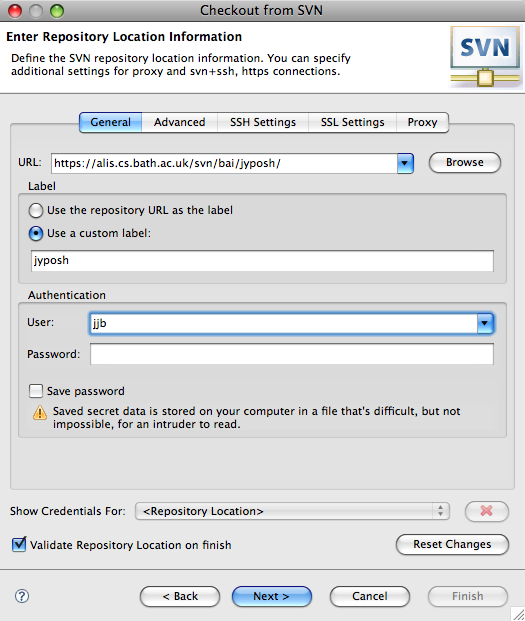
URL is important, the
label will really get read. You need a BOD SVN
account.
|
- If above does not work for you, follow instructions of the
"Installing with the zip
file" section on the same page.
- Next you need to tell PyDev where to find Jython by following these
instructions. To use jyPOSH with Jython, you only need to set up
the Jython interpreter in the Interpreter -
Jython section by pointing it to the "jython.jar" file of your
Jython installation. Setting up the Python interpreter is optional
(given that you Python installed).
- Notes for Mac users: It
seems like that selecting "jython.jar" from your Jython installation is
sufficient at this stage (at least it was when I tried).
- Notes for Linux users:
On my system, Eclipse was complaining when selecting the "jython.jar"
file located at /usr/share/jython. I had to select
"/usr/share/java/jython.jar" and add the folders
"/usr/share/jython/Lib" and "/usr/share/jython/Lib-cpython" to the
System PYTHONPATH to set up PyDev properly. These folders work for
Ubuntu Linux (when installing Jython with the package manager), but
might be different for different Linux distributions.
- Notes for Windows users:
I have not tested the instructions on Windows (yet), but according to
the PyDev documentation, simply choosing "jython.jar" from the Jython
installation should do the trick.
- Now you should
probably use Eclipse to import jyPOSH directly from SVN.
- This only works if you are a BOD
Developer and have an SVN account login.
- There
are instructions about how to add SVN to eclipse on Joanna's mac OS X
page (the instructions are good are good for other OSes too).
- The URL you want to use is https://alis.cs.bath.ac.uk/svn/bai/jyposh/.
- If you leave it as the default label, it will pretty much do
the right thing.
- Choose "trunk" under the Select
Resource page, then click the "finish" button.
- Replace the "SUBMISSION" label with "jyposh" on the Check Out As page (at least
currently you have to do this. It seems like a bug that might get
fixed...)

|

|
Select only the package
you need...
|
and the next screen looks
like this!
|
- Otherwise,
import your existing jyPOSH as a project under Eclipse
- Create a new PyDev Project in Eclipse. The PyDev
pages have instructions on how to do this, but while following them
consider the following:
- You might want to call your project "jyPOSH" or something
similar.
- Choose "jython 2.1" as the project type
- Do not create a default 'src' folder (we will add it
manually
in a later step). You don't need to reference any other projects either.
- Import the jyPOSH files. In the Navigator in
Eclipse (that's the pane on the left where you can see the name of the
newly created project),
- right-click (or control-click) on your new project and
- select Import and
then General
-> File
System.
- Select the folder where you extracted the jyPOSH Files,
making sure that all the files in the directory are selected.
- This should result in all the jyPOSH files and folders
being
copied into the project. If you can see them in the Navigator,
everything should be fine.
- Whichever
method you used, now you need to set the source and class path.
Make sure that the project is
selected in the Navigator and then, in the Eclipse menu,
- select Project and
then Properties,
- select PyDev - PYTHONPATH,
and then Add
Source Folder in the Project Source
Folders and jars section. Make sure that the project root is
selected and click OK to
declare the jyPOSH root folder as a source folder. Additionally add the
following JAR-files by selecting Add jar in
the Project
Source Folder and jars section:
- <jyPOSH-directory>/POSH/log4j-1.2.jar (the logging
infrastructure for slip-stack POSH)
- <jyPOSH-directory>/platform_files/MASON/mason.jar
(to
run MASON
simulations)
- Creating Eclipse run profiles to run jyPOSH from Eclipse
- These instructions are to create a run profile for "jyposh.py",
but the procedure is the same for any other script:
- Load the "jyposh.py" file into the editor by selecting it in
the Navigator.
- Select Run -> Run As
-> Jython Run from the Eclipse menu. This should start the
jyPOSH GUI. If that does not happen, then something is wrong. Please
read the error messages (if there are any useful ones) and check if you
have followed the previous instructions carefully.
- You can close the GUI, and now have a run profile in the
"Jython run" section that you get to by Run -> Run...
in the Eclipse menu. You can rename the profile by changing the Name
textbox, and choosing Apply.
- The GUI can now be started by choosing the created run
profile from the Run -> Run...
menu, and can be added to the favourite run profiles by ticking Run in the Display in
favourites menu in the Common
section of this profile.
- You can create similar run profiles for MASON simulations by
using the same settings as above, but replacing "jyposh.py" by the the
simulation file (py-files in the mason_simulations directory).
page
author: Joanna
Bryson, updating earlier pages by Jan Drugowitsch, based
on (read `fixing')
even earlier pages by Joanna Bryson and
Tristan Caulfield.


